Lighting outside of studio conditions can be tricky, especially when shooting something in motion or without a tripod where you don’t have exposure time as an option for getting more light into the camera. The sort of 3D-reconstruction-from-images I work with needs hundreds of source photos, and this makes it prohibitive to use flash-triggered lighting (they are too slow to recharge and don’t have enough shots per charge). My first large-scale shoot of the Trafalgar St graffiti tunnel was achieve with the help of an Elinchrom Ranger Quad 2-head setup that I was using on continuous mode (i.e. just the studio/video light, not flash-triggered). These kits go for about AU$3000, but with the studio lights and softboxes I was having to shoot at 3200 ISO to get a usable image! Not ideal.
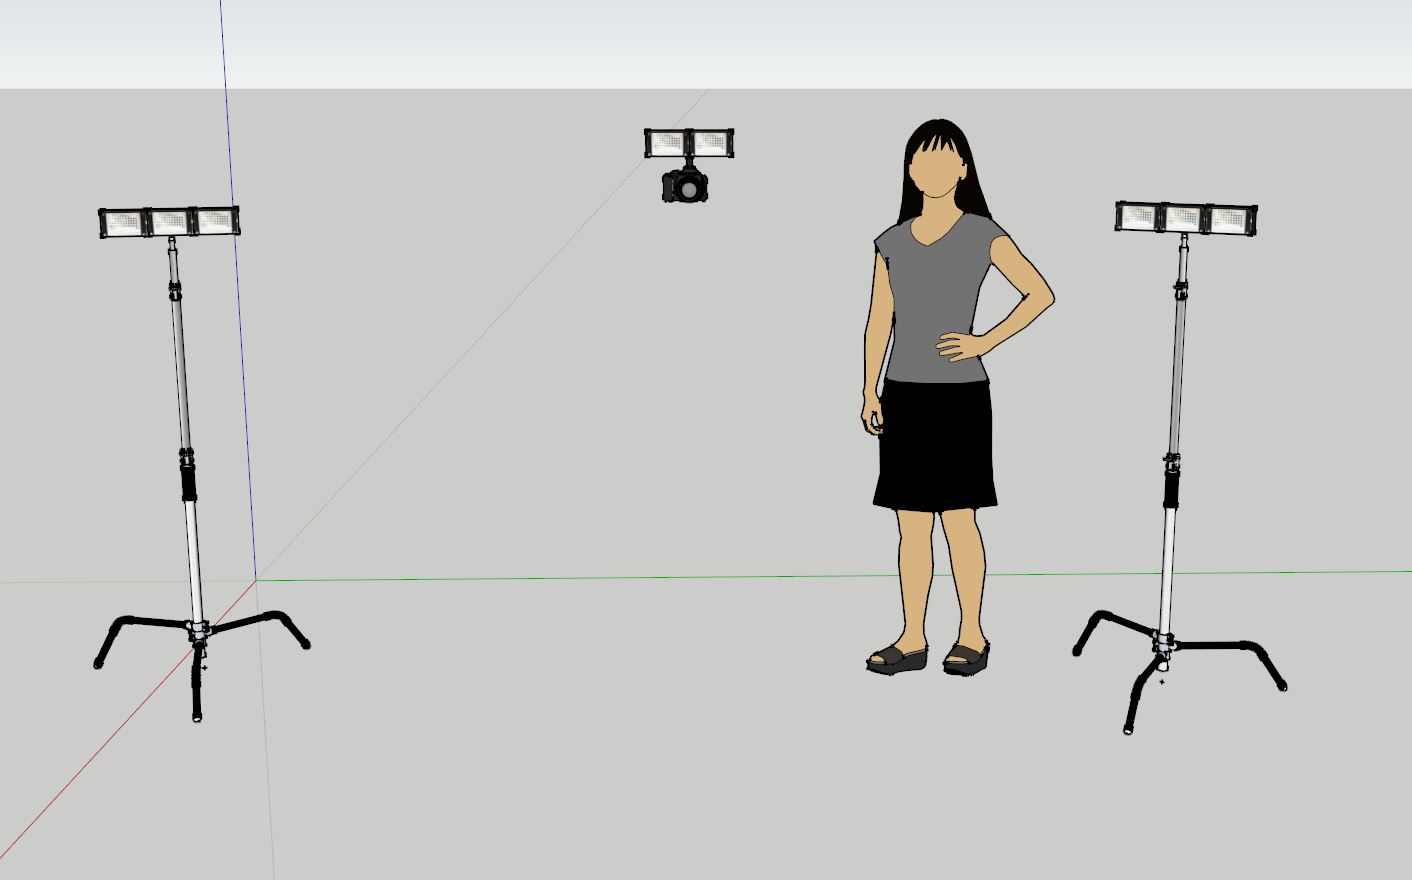
More recently, I’ve invested in 8 x HDV-Z96 LED lights. Here’s my experiences using them.
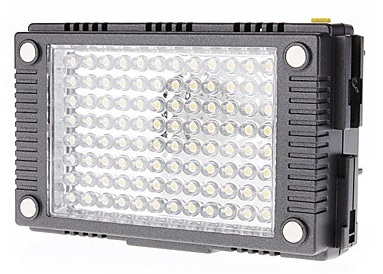
HDV-Z96 LED lights
Pros
The Z96s are cheap, portable, and support a bunch of configuration options for clipping them together in various ways.
Each light is a nice, bright 800 lux, which stack up even nicer when you start adding more. Compared to the Ranger studio light, I was able to shoot comfortably at 600 ISO with the same settings, which was great.
They give a nice balanced white.
The diffuser filter does a good job at giving a smooth light.
Cons
While the Z96s themselves are acceptable build quality, some of the bits and pieces included with them are a bit cheap. The hot shoe adapter isn’t convincingly robust.
For me, the main issue was finding cheap Sony-compatible batteries that give the output rate needed to run 4 of the units at once. After a couple of false starts via ebay, with broken spec promises and returns, I went with BetterBatt here in Australia for cheap OEM Sony-compatible batteries. (This isn’t a sponsored link, just a FYI).
Field Experiments
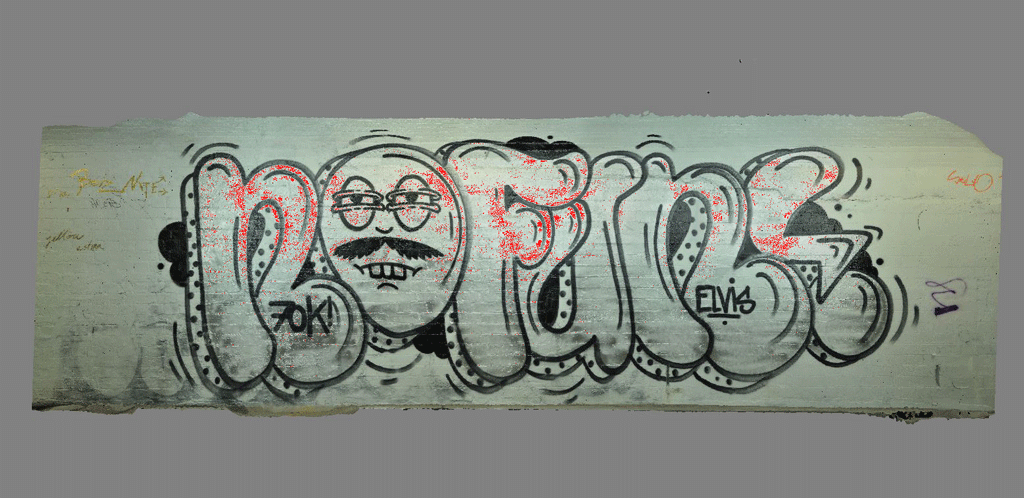
I’ve been working with the setup as shown above: two “3 x 1” configurations on stands, and a “2 x 1” on the camera attached to the hot shoe. The results are a whole heap of light, but as this test reconstruction shows it’s not perfect. There is a whole heap of metallic paint used in graffiti in the Trafalgar St tunnel, and this poses some difficult problems with hot spots from the lighting (see below). While some of this is mitigated by the texture construction process (projecting all the images back onto the 3D geometry and averaging out the results), it is in danger of cutting out data in used to reconstruct the wall, and introduce errors.
You can see in the image below that even areas not “blown out”, the uneven lighting produces some effects (see the gold paint top-left).
Softboxes
Having reached this point, I decided to have a go with a couple of options for soft-boxes (below), but found that metallic paint was still producing hot spots at head height, while also cutting back significantly the amount of light available.


Thoughts
I’m now thinking that shooting a second set of images from a kneeling position will capture the data that was blown out from a standing position, and allow the two sets to work together to give full coverage.